
How to Build a Base in SERESGENUS: EPHEMERALITY (Setup, Storage and Upgrades)
Set up your base in SERESGENUS: EPHEMERALITY step by step: craft and place a Crafting Table and Campfire, store items in a Wood Chest, upgrade the table in place, and prepare for your next expedition.
Quick answer
Craft a Crafting Table in Hand Crafting, place it on the ground beside the portal that unlocks each world, then craft a Wood Chest at that table and store your items in it. Place a Campfire beside the portal too, and upgrade that same table in place as your run goes on.
- Base objects: Crafting Table, Campfire and Wood Chest — plus an Ender Chest once your table reaches Crafting Table III.
- Crafting Table upgrade I to II: 50 Wood, 20 Stone, 10 Steel Ingot and 5 Rope, via the UPGRADE X1 button.
- The base is where your treasures are stored and where you prepare for the next expedition.
A base in SERESGENUS: EPHEMERALITY needs very little to get started: two objects crafted straight from the Hand Crafting menu, one storage chest, and a patch of ground beside the world portal. This guide walks through the full setup, what each object does, how the Crafting Table upgrades, and how the base feeds the game's gather, craft and build loop. If you are completely new to the game, the beginner guide covers the very first steps.
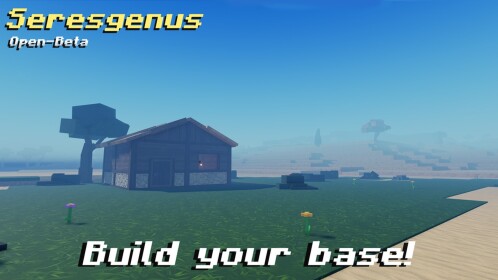
Where your base sits
Your base is anchored to the portal that unlocks each world. In a demonstrated run of the current build, the base area sat directly beside that portal, with everything the player had placed — crafting tables and storage chests — grouped there alongside it. That makes the portal the natural anchor for your own setup: place your objects next to it and the whole base lives in one spot, the same place you prepare each next expedition from. The home portal guide looks at the portal itself in more detail.
Setting up your first base
- Craft a Crafting Table in Hand Crafting. Both of your first base objects come from Hand Crafting, so you can build them before you have any crafting station placed.
- Place the Crafting Table on the ground beside the world portal. This is the table you keep: later upgrades apply to the placed table itself rather than replacing it.
- Craft a Campfire in Hand Crafting and place it on the ground near the portal. The demonstrated first camp placed the table and campfire side by side.
- Craft a Wood Chest at your Crafting Table. The chest is crafted at the table, so the table needs to be standing first.
- Store your items in the Wood Chest. With that done the base is functional: your loot and materials have a home, and your crafting station is up.
The crafting guide explains the crafting system behind these steps.
What to place at your base
Four objects cover the base from its first camp to late-run storage:
Base objects and what they do
Crafting Table
Crafted in Hand Crafting and placed on the ground. Your base workbench — the Wood Chest is crafted at it — and it upgrades in place instead of being replaced.
Campfire
Crafted in Hand Crafting and placed on the ground near the base portal, alongside the Crafting Table.
Wood Chest
Crafted at your placed Crafting Table. Your first item storage: craft it at the table, then store your items inside.
Ender Chest
Crafted using Voidstone Ingot and Abyss Horn once your Crafting Table has reached level III.
For a closer look at chest storage at your base, see the base storage guide.
Upgrading your Crafting Table
The table you place is the table you keep. Upgrading works on the placed table itself — you upgrade that same Crafting Table in place rather than crafting a replacement — and the upgrade path continues past level II all the way to CRAFTING TABLE III.
The first upgrade is listed right on the table's panel. A Crafting Table I shows the line:
Upgrade to II: 50 Wood, 20 Stone, 10 Steel Ingot, 5 Rope — activated with the UPGRADE X1 button on the same panel.
So stack up 50 Wood, 20 Stone, 10 Steel Ingot and 5 Rope before pushing for level II. These are resources you gather from the worlds you explore anyway; the how to gather materials guide covers that side of the game.
Once the table reaches Crafting Table III, an Ender Chest becomes craftable using Voidstone Ingot and Abyss Horn, giving your base a second chest alongside the Wood Chest.
The loop: gather, craft, build and prepare
The developer frames the whole game as a "Gather, Craft & Build" loop, and the base is where it comes together:
How the cycle works
Gather
Collect resources from the worlds you explore.
Craft
Spend those resources on weapons and gear.
Build
Build your own base — the tables, campfire and chests from this guide.
Prepare
Store your treasures at the base and prepare for the next expedition from there.
The loop feeds itself: the treasures and resources you bank at the base are what you prepare with for the next expedition.
For what counts as a resource and where each one goes, the resources guide has the details.
Building a base solo or with friends
None of this is locked to solo play. The official description offers the adventure alone or with friends, and lists building bases among the things a party does together, alongside exploring, gathering resources and fighting through the worlds. If you would rather raise a shared base as a group, the how to play with friends guide covers the co-op side.
With a table placed beside the portal, a campfire next to it and a chest holding your loot, the base is doing exactly what it is built for: storing your treasures and getting you ready for the next expedition.
Related Guides
Crafting Guide: Tools, Weapons and Gear
Where to access crafting and how to craft tools, weapons and gear for your runs.
Base Storage: Wood and Ender Chest
What goes in the Wood Chest versus the Ender Chest and what survives between runs.
Home Portal: Set a Heart and Travel
Where the home portal stands, how to set a Heart and travel between base and worlds.