
SERESGENUS: EPHEMERALITY Base Storage Guide: Wood Chest and Ender Chest
Item storage in SERESGENUS: EPHEMERALITY: base chests like the Wood Chest for everyday items, and the Ender Chest for gear carried between runs, including how to bank loot on the completion screen.
Quick answer
SERESGENUS: EPHEMERALITY item storage runs through chests at your base, such as the Wood Chest, and the Ender Chest, which keeps gear between runs. You bank loot into the Ender Chest from the STORE IN YOUR ENDER CHEST panel on the completion screen: click a stack to send it to your Ender Chest for a later run, and click it again to take it back.
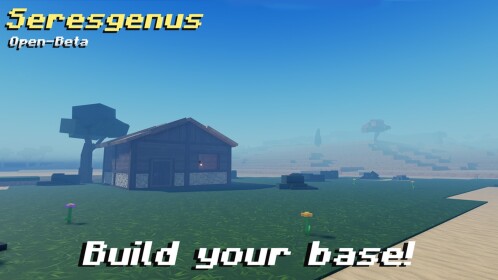
- Your base is the place to store your treasures and prepare for the next expedition, and the base area holds the travel portal, crafting tables and storage chests.
- A Wood Chest is crafted at a Crafting Table and stores your items at base.
- An Ender Chest is crafted at a CRAFTING TABLE III using Voidstone Ingot and Abyss Horn.
- You must craft an Ender Chest in a run to open it and take stored gear back out.
In SERESGENUS: EPHEMERALITY your loot has two separate homes. Chests at the base you build hold your treasures at home — the game describes the base as the spot to store your treasures and prepare for your next expedition. Plain chests, like the Wood Chest, hold your everyday items at home. The Ender Chest is the separate cross-run bank: you bank gear into it from the completion screen when a run ends, and it comes back out in a later run.
Storage options at a glance
Data table
- Storage option
- Wood Chest
- Where you use it
- On the ground at your base
- How you get it
- Crafted at a Crafting Table
- What it holds
- Items you store while at base
- Storage option
- Ender Chest
- Where you use it
- At your crafting table in a run, plus the run completion screen
- How you get it
- Crafted at a CRAFTING TABLE III with Voidstone Ingot and Abyss Horn
- What it holds
- Gear and loot kept for later runs
Your base: storage at home
Gather, Craft & Build is the loop the whole game hangs on. You gather resources from the worlds you explore, spend them on weapons, gear and base buildings, and the finished base is what stores your treasures and launches the next expedition. Storage is not a side system bolted onto that loop — it is the base's actual job.
Layout-wise, the base sits beside the portal used to travel to the worlds, and in one run the base area held the portal, the crafting tables and the storage chests together. Keeping chests near the tables you craft at makes the home loop quick: unload loot into storage, craft what you need, then step into the home portal and head back out. If you have not built a base yet, the how to build a base guide covers the build itself, and the resources guide covers what each world yields.
The Wood Chest: your first storage
The Wood Chest is the early, straightforward item chest. In one run, the player crafted a Crafting Table and a Campfire in Hand Crafting, placed both on the ground, then crafted a Wood Chest at the crafting table and stored items in it. That sequence is the basic pattern for base storage: craft the station in Hand Crafting, place it at your base, and the chest becomes craftable at that station. Once it is down, everything you haul home has somewhere to sit while you decide what to craft next.
The Ender Chest: storage between runs
The Ender Chest is the chest the game ties directly to later runs. You can retrieve cross-run gear from an Ender Chest during a run, and end-of-run loot is explicitly banked into it "for a later run".
An Ender Chest is crafted at a Crafting Table that has been upgraded to CRAFTING TABLE III, using Voidstone Ingot and Abyss Horn. The table upgrades in place, tier by tier: the Crafting Table I panel shows the line "Upgrade to II: 50 Wood, 20 Stone, 10 Steel Ingot, 5 Rope" with an UPGRADE X1 button, and further upgrades from there take the table up to tier III. The crafting guide covers the wider system if you are planning the climb.
Setting up storage, step by step
- Craft a Crafting Table and a Campfire in Hand Crafting, and place them on the ground at your base.
- Craft a Wood Chest at the table for everyday item storage.
- Open the table's panel and upgrade in place — tier I to II costs 50 Wood, 20 Stone, 10 Steel Ingot and 5 Rope through the UPGRADE X1 button.
- Keep upgrading until the table reads CRAFTING TABLE III.
- Craft the Ender Chest with Voidstone Ingot and Abyss Horn.
That is the path one run followed from a fresh base to a working Ender Chest.
What goes into the Ender Chest
When a run ends after the final boss, the completion screen shows a STORE IN YOUR ENDER CHEST panel, and its printed instructions say it all: "Click a stack to send it to your Ender Chest for a later run; click again to take it back. Craft an Ender Chest in a run to open it."
Banking loot is a click-per-stack decision. Send up everything you want waiting in your next run, and click a stack a second time if you change your mind before leaving. The panel also tracks its own space: in that run it read "Stored 4 - 22 slots free", meaning four stacks banked and 22 slots still open.
That run's panel offered a wide slice of late-run loot: Voidstone, Voidstone Horn, Voidstone Axe, Beast Bone, Beast Hide, Carnage Plate, Coal, Darkroot Wood, Elderwood, Elemental Residue and Khaen Form — resources, materials and gear side by side. For what else a finished run pays out, see the run rewards page, and how to win a run covers the road to that final boss.
Getting stored gear back out
The panel's last line is the access rule: "Craft an Ender Chest in a run to open it." To take cross-run gear out of storage, you craft an Ender Chest during that run — the recipe shown in the reviewed run: a CRAFTING TABLE III plus Voidstone Ingot and Abyss Horn — and open it. That makes the Ender Chest a deliberate choice rather than a passive stash: bank the loot you genuinely want waiting for you, and remember the chest itself has to be crafted before anything comes back out.
Which storage to use
Both, for different jobs. The Wood Chest solves the immediate problem of where to put items while you craft and build at base. The Ender Chest is the long game: it is the storage the game attaches to later runs, with its own banking screen after the final boss and a craft-to-open rule for taking gear back out. Keep everyday stacks in base chests, and reserve the Ender Chest for the gear and materials you want ready when the next expedition starts.
Related Guides
How to Build a Base
Set up your base with storage and upgrades so every run ends prepared for the next.
Run Rewards: Results Screen and Loot
What the results screen pays out after a run and which rewards you actually keep.
Crafting Guide: Tools, Weapons and Gear
Where to access crafting and how to craft tools, weapons and gear for your runs.